Active cooling is essential on production-ready platforms like the AMD Versal V80 which can consume close to 200W of power under full load. Although it is recommended to only run the V80 in a server system with appropriate cooling, academics like me might not always have quick access to such systems. This project provides a custom 3D-printable active cooling fan shroud designed to attach an 80mm fan directly to the V80 board, ensuring optimal airflow across the board’s heatsink.
xbtest pre-canned stress test (upto 250W peak power draw), the card did not exceed 85°C with this setup! As an aside, the V80 installed in a server is not even guranteed to be cooled better than this setup!
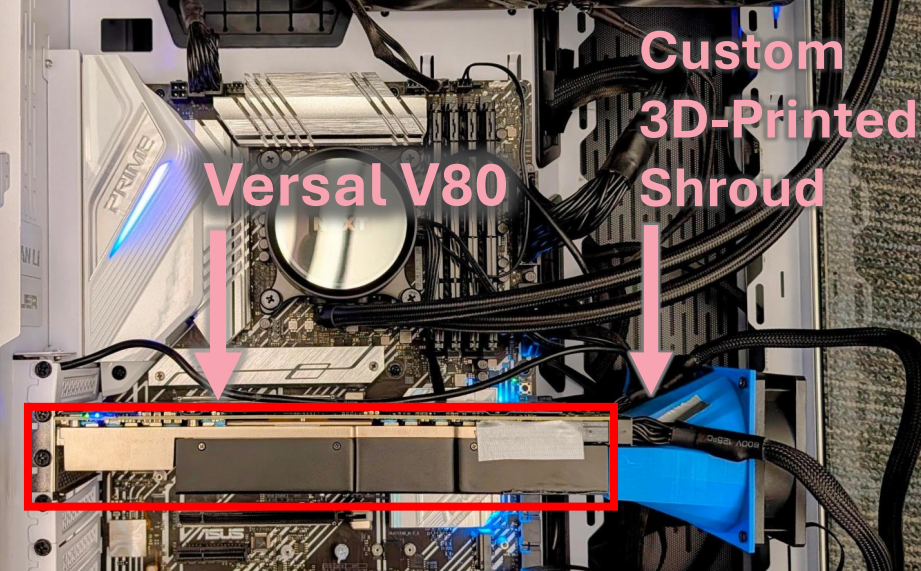 The active cooling fan shroud installed on the AMD Xilinx Versal V80.
3D Model & Design
The shroud’s geometry fits precisely around the V80’s physical profile, directing airflow directly through the passive fins. Appropriate spacing is built in to allow for PCIe power and USB connections.
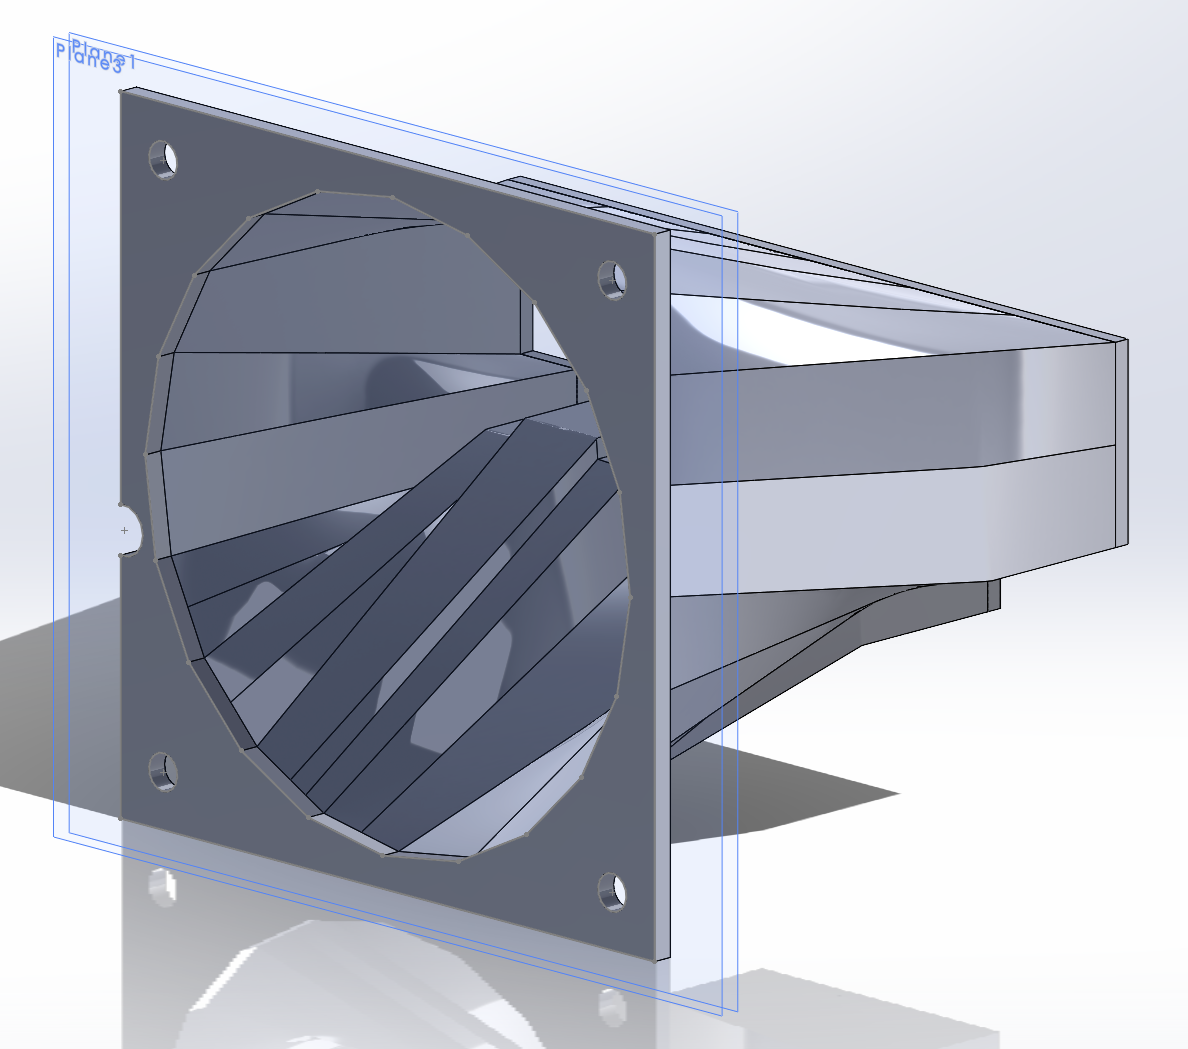 3D render of the fan shroud.
- Download 3D Model: v80_side_golden_usb_fixed.STL / v80_shroud.SLDPRT (also available on Thingiverse)
3D Printing Recommendations
When preparing the model in your slicer, keep the following tips in mind:
- Orientation: Place the fan-side down on the build plate for the best print results and to minimize necessary supports.
- Warning: A part of the shroud is extremely thin (one of the screw holes as they pass through the loft surface) and might produce a hole. This hole is very small and can be easily patched with some duct tape or glue.
Assembly & Mounting
- Fan Selection: The design is tailored for 80mm fans. We recommend a fan with high static pressure at full speed to push air effectively through the dense heatsink.
- The recommended fan is the ARCTIC P8 Max (80 mm High Speed PWM Fan), but any standard 80mm fan should fit.
- Screws & Mounting: The shroud features screw holes for both the V80 heatsink and the 80mm fan.
- Shroud to V80: Use standard M2 screws (6–7mm length), which are the same size as the screws found on the bottom of the V80. Alternatively, tape can be used to secure the shroud to the board.
- Fan to Shroud: Use regular fan screws (or longer M3.5 screws with a nut).
- Sealing Gaps: To ensure a tight seal and optimal airflow, make sure all gaps are taped off. In particular, tape off the MCIO connectors area on the V80 near the PCIe power connectors.
- Support & Case Fit:
- Card Support: The fan is not directly secured to the case. Since the shroud and fan are relatively light, they can hang directly off the V80 card. However, if you are concerned about the added stress on the PCIe slot, you can place a support or spacer underneath the fan.
- Case Compatibility: Any case deep enough to accommodate the extra depth of the shroud and fan setup should be fine.