The token system implements a queue-based allocation system for handling customers with requests in a FCFS (First Come, First Served) manner. The motivation behind this code was to streamline the answer sheet grading doubt session, or, as it is called at IIT Bombay, the "Crib Session", for the course in which I was a Teaching Assistant.
Dependencies
Google Forms
To facilitate ease of access for both clients (students) and servers (teaching assistants), the project uses Google Forms to supply the input data stream. To use Google Forms, the user of the code must have access to Google Forms and therefore must also have a Google Account.
Operating System
The project has been written in Python 3 and compiled into a standalone executable using PyInstaller 3.4 and tested on two systems:
- Ubuntu 18.04.1
- Windows 10
Note: For Linux-based systems, the Python executable depends on the linking of some libraries, which may require the latest packages available on those systems. The source code is available for those who would like to use or build the program from source.
Additionally, for Ubuntu systems, updates can be performed using:
sudo apt update
sudo apt upgrade
Setup
The program, along with the credentials.json file required to connect to the Google Sheets API and a sample configuration file, can be found in the release hosted on GitHub:
The tar.gz archive is for Linux, while the .zip archive is for Windows.
Note: The first time you run the program, you will have to log in using your Google ID to provide the program access to read your Google Sheets.
Warning: Note that the archives do not contain a subfolder, so extracting them will release all contents into the current directory.
Linux
First extract the downloaded release:
mkdir token
tar -xzvf <PATH_TO_DOWNLOAD_LOCATION>/token_v1.0.tar.gz -C token
cd token
Then the executable must be given execute permissions and can be run as follows:
chmod +x generic
./generic
Windows
Extract the ZIP archive into a folder and run generic.exe
Setting up Google Forms
To ensure that the input methods are compatible with the program, the forms and their sheets must adhere to some guidelines which are listed here.
Student-Side Google Form
The important rules for this are:
- The ID, Name, and Queue Selection questions must be ordered sequentially (and can be preceded or followed by questions of any other format).
- The ID question must be marked as required.
- The Queue Selection question:
- Must use checkboxes, and
- Every option must begin with a unique number.
A sample form is shown below:
Server-Side (TA) Google Form
The important rules for this are:
- The first question must ask for the ID of the server (subsequent questions do not matter).
- The question must be a multiple-choice question (MCQ) of the radio-button type, with each option beginning with a unique ID.
A sample form is shown below:
Integrating with Google Sheets
The responses from both forms must be directed to separate sheets within a single spreadsheet. The ID of this spreadsheet and the names of the individual sheets must be specified in the configuration file.
Configuration File
Here is the breakdown of the configuration file and its constituents. It must be named exactly configuration.inf. A sample file can be found here.
Note: Lines beginning with a
#in the configuration file are treated as comments.# Example: This is a comment
Warning: The line ordering must be strictly followed, as the program relies on spatial positioning relative to other elements to identify the meaning of the data.
Line Format
Each line consisting of data has two parts:
- The part before
:is for readability and is ignored - The part after
:is the actual data which is read
Note: The space after the
:is important and if absent will prevent data from being read.
Spreadsheet Data
The first line mentions the ID of the spreadsheet linked to both the forms. For example, a spreadsheet with the url https://docs.google.com/spreadsheets/d/10Mrb6Up7q_ZtgJmb814JaHsconiOG_x76K5__u6h9SA would have the following entry in the configuration file (basically the part after .../d/):
#Line 1: Spreadsheet linked to both the Forms
Spreadsheet ID: 10Mrb6Up7q_ZtgJmb814JaHsconiOG_x76K5__u6h9SA
The next line mentions the sheet name for the Students response sheet within the spreadsheet:
#Line 2: Sheet Name linked to Student Form
Push Request Sheet: Form responses 1
This line mentions the column letter which contains the ID which is a required field of the form. It is assumed that the Name and Queue Question follow in the next two columns:
#Line 3: Roll Number Column ID
Column: B
The next line mentions the sheet name for the Servers (TAs) response sheet within the spreadsheet:
#Line 4: Sheet Name linked to TA Form
Pop Request Sheet: Form responses 2
Queues
This line gets information about the number of queues which is same as the number of checkbox options in the form:
#Line 5: Number of Queues (Based on TAs)
Queue Count: 6
In the next Queue Count lines, the headers displayed on the GUI:
#Line 6 to 6 + Queue Count: Headers [Count equal to Queue Count]
1: Question 1
2: ... and so on
Graphical User Interface
The GUI is used to display the allocation to everyone (even the servers) as this is the only output (other than the debug output on the terminal).
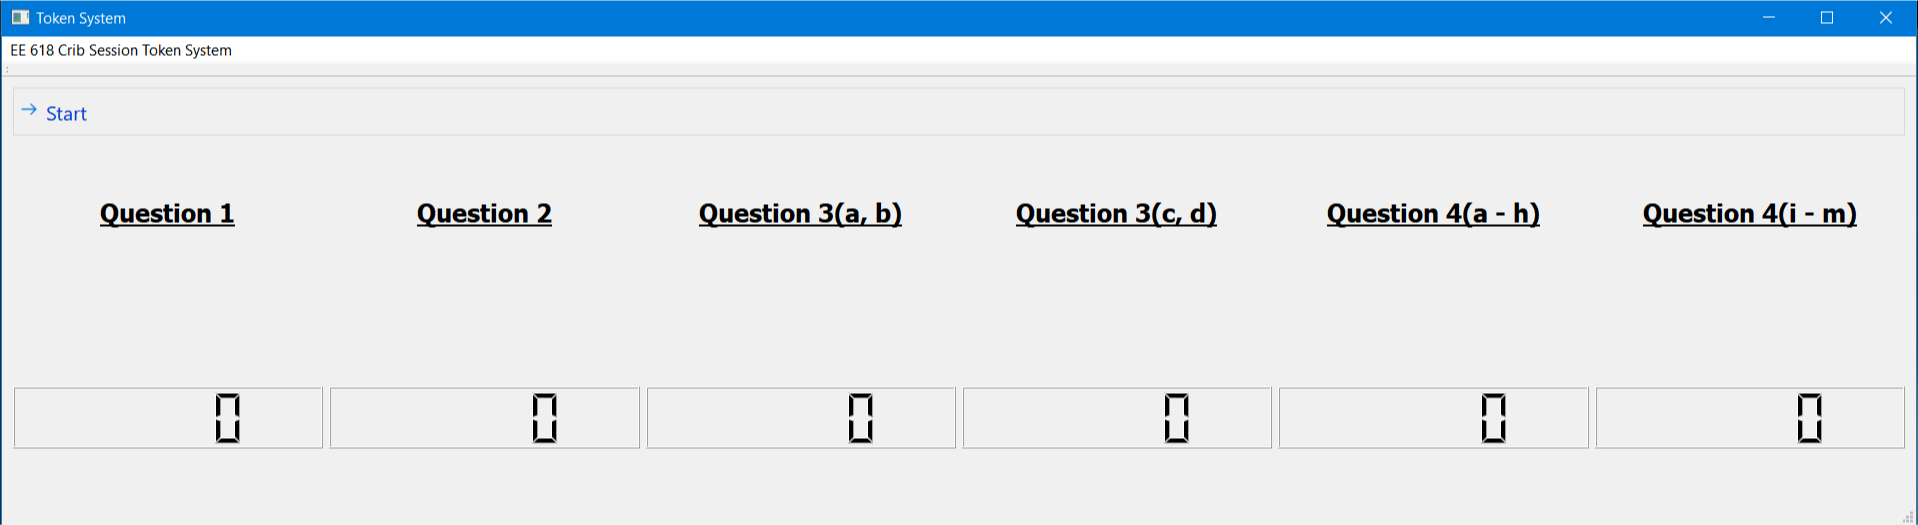
The GUI supports up to 12 queues in the form of 2 rows with 6 queues in each. The above image shows a sample with 6 such queues.
| Sr. No. | Brief Info | Long Description |
|---|---|---|
| Row 1 | Headers | Queue names obtained from the configuration file |
| Row 2 | ID | Students’ Unique Roll Number/ID |
| Row 3 | Name | Students’ Name or any other parameter |
| Row 4 | Queue Size | Number of waiting requests |