2.2 Mesh the Object
The way
to mesh the part would be to finely mesh the lines where loads are applied.
In this problem, loads are mainly concentrated on inner circles of hole on
the right hand side (smaller hole). Therefore, finer mesh should be in that
area.
Click on the arcs that form the crank's hole(smaller circle at the right
end). (enter NDIV = 30)
MAIN MENU -> Preprocessor
PREPROCESSOR -> -Meshing -Size Contrls
SIZE
CNTRLS -> -Line
-Picked Lines
ELEMENT SIZE ON PICKED LINES -> Click on the arc and circle
that form the smaller circle(crank side).
ELEMENT SIZE ON PICKED LINES -> Click OK.
ELEMENT SIZE ON PICKED LINES -> Enter 30 in the NDIV box. Click OK.
Click on the arcs that form the pedal's hole(larger circle at the left end)
and the lines connecting two circles. (enter NDIV = 15)
SIZE
CNTRLS -> -Line -Picked Lines
ELEMENT SIZE ON PICKED LINES -> Click on lines connecting pedal
and crank and the arcs that forms pedal.
ELEMENT SIZE ON PICKED LINES -> Click OK.
ELEMENT SIZE ON PICKED LINES -> Enter 15 in the NDIV box. Click OK.
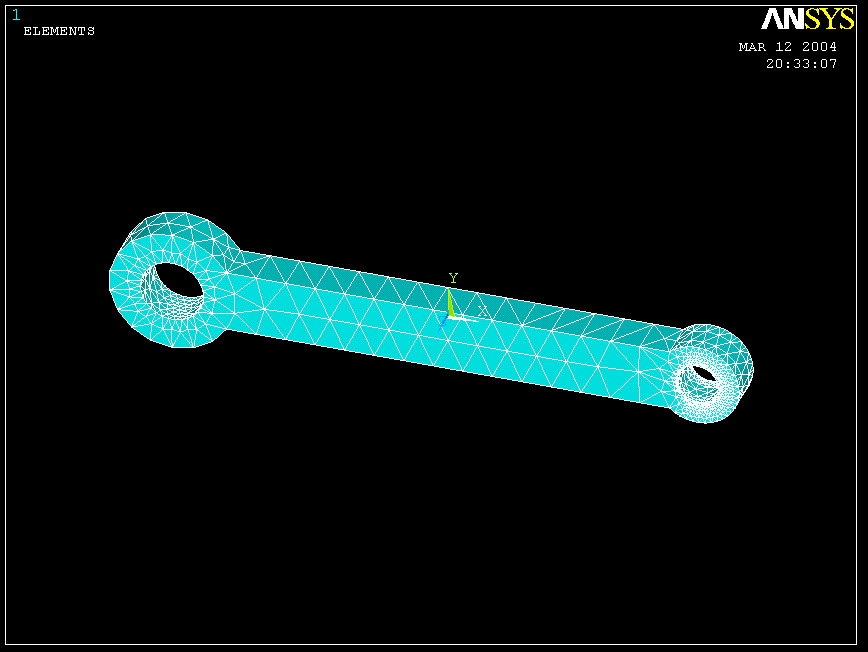
Now
the meshed lines should look similar to the image below. Then we are ready
to mesh the volume.
Use the following command:
MAIN MENU -> Preprocessor
PREPROCESSOR -> -Meshing -Mesh
MESH
-> -Volume
- Free
MESH
VOLUMES -> Click on the part. It will change color. Click OK.
The meshed
part should look similar to the one displayed here. However, you can remesh
the part so that there are more number of elements where loads are applied.