![]()
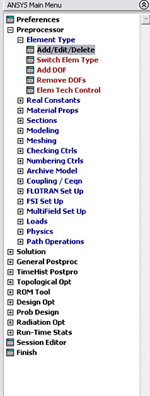
From
the drop down menu
PREPROCESSOR -> Element
Type
ELEMENT TYPE -> Add/Edit/Delete...
ELEMENT TYPES
-> Add
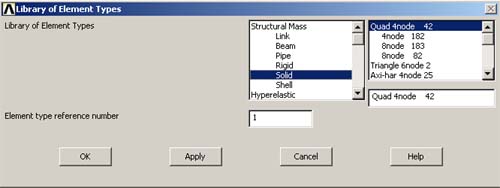
Then, you will see the window, LIBRARY OF ELEMENT
TYPES, choose structural Solid Quad 4node 42
and type 1 for Element type reference number.
Then click OK.
Now, we have specified the structural element type.
PLANE42 is now defined and assigned to reference 1. Your Element Types window should look like the figure below.
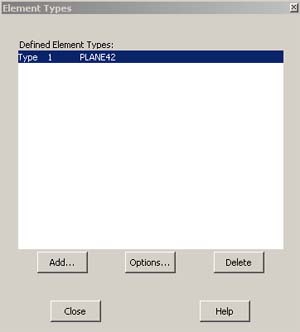
Note: PLANE42 is used for 2-D modeling of
solid structures. The element can be used either as a plane element (plane
stress or plane strain) or as an axisymmetric element. The element is defined
by four nodes having two degrees of freedom at each node: translations in
the nodal x and y directions. For more details about this or other Element
types, see ANSYS help
Alternative commands for executing the above
precedure are:
ANSYS INPUT -> /prep7<CR>
ANSYS INPUT -> et,1,42 <CR>
The next step is to specify the material properties of the plate. There
are 2 ways of doing this.
Method 1
PREPROCESSOR -> Material
Props
MATERIAL PROPS -> Material
Models
Then, the window "Define Material Model Behavior" will appear. You should double click on each of the following:
Structural -> Linear -> Elastic -> Isotropic
After you double click on Isotropic, you will see this window.
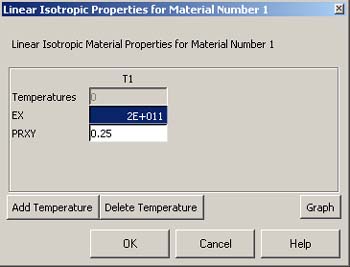
Then
enter the value for Young Modulus and Poisson Ratio given in this problem.
Click OK
Note: In the cases where multiple materials are used, you can specify the
properties and assign them to other material numbers (2, 3, 4, etc.)
Method
2
PREPROCESSOR -> Material Props
MATERIAL PROPS -> Material Library
MATERIAL LIBRARY -> Import Library
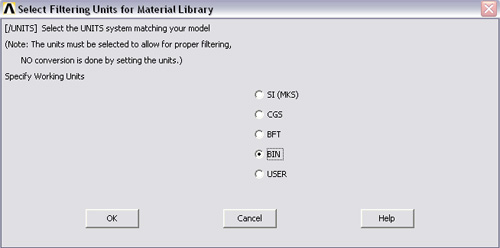
You
should then see the following window, prompting for the units used in this
analysis. Click on BIN
and OK.
Following is the directory where the material property files for different types of materials are.
C:/Program Files/ANSYS Inc/v70/ANSYS/Matlib/fileStl_AISI-304.BIN_MPL
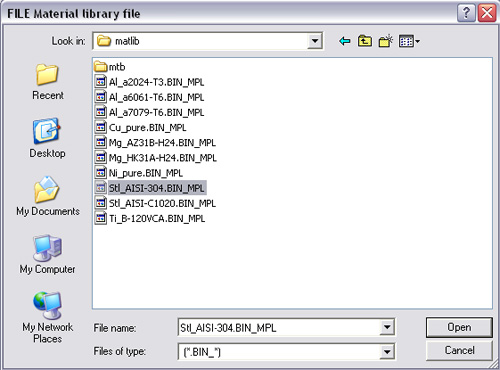
Then, the following window should appear.