How
were the murals at John's 44th St. made
Douglas
Cooper, artist
Professor of Architecture
School of Architecture
Carnegie Mellon University
Pittsburgh, PA 15213
(412) 268-2367
(412) 268-1537 FAX
E-mail Douglas Cooper at dcooper+@andrew.cmu.edu
Sarah Cooper,
Artist's Assistant
John Trivelli, Artist's Assistant
Rebecca Schultz, Artist's Assistant
Andrew Tesoro, Architect
Articles
about the Murals
Back to Douglas Cooper
Back to the murals at John's 44th St., New York
Making the murals...
We drew the murals off-site in my studio in Pittsburgh. I employed three assistants. My daughter, Sarah Cooper, who produced the photographic work for the front room mural and did some of the figures in the murals; Rebecca Schultz, who did much of the developmental and execution work for the Mezzanine mural and many of the figures in the other murals; John Trivelli who worked with me throughout the project on all of its aspects. We began in December 1996, and we installed the murals at John's 44th St. in early May 1997.
We began with the Main Room Mural. A key issue in composing this mural in was anticipating the sight lines at the Rotunda. I laid out the images in a cartoon format at a scale of 1 inch to 1 foot. With these cartoons, I was able to locate important large elements opposite major directions of approach and compose those portions of the mural that would be seen from across the space through the Rotunda's openings.
After hauling the panels up to my studio (which unfortunately is on the second floor of an old school house), the first thing we did was to coat the panels with a normal commercial sealer in order to isolate the acidic material which is natural to wood. Then we glued acid free paper onto the panels with acrylic gel-medium. This would comprise our drawing surface. We mounted the paper both front and back in order to protect against the paper causing the panels to cup.
To begin the actual drawing, we constructed a scaffold to hold the upper and lower echelons of panels in their proper positions. While we were always able to see the full height of the mural, owing to the size limitations of my studio, at any single point in time, we were only able to view 24 foot-wide portions.
After ghosting in the image in pencil, we drew the mural using vine charcoal. Vine charcoal is a very malleable material that allowed us to work easily back and forth between eraser and charcoal.
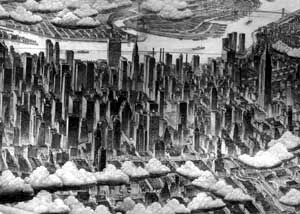
Accuracy about the Pittsburgh landscape came from much on-site sketching, photographs and historical books. More importantly, accuracy as to the "feel" of the Pittsburgh topography-its hilliness, its twisting vistas and its river orientation-came from my many years of on-site sketching throughout Pittsburgh.
Finally when the drawing was completed and fixed, we coated each panel front and back with several layers of acrylic gloss medium and varnish. After the acrylic had cured for at least a week, we brushed on an outer surface of Soluvar picture varnish. This outer surface is reversible (it can be removed with mineral spirits) when it accumulates dirt and/or yellows.
We installed the panels at the site with aluminum mending plates affixed to the back of each panel. On any given panel, these plates slide into the slot provided by the plates of the adjacent panel. In this way sliding the hardware of each panel in behind its adjacent panel, we were able to install the mural with no visible hardware.