Lecture 8: WatchKit
Announced on September 9, 2014, the Apple Watch is Apple's latest technology--one which takes a headfirst plunge into not only the smartwatch market, but also the luxury wristpiece market. With a price range starting at $350 and extending to $17,000, it's not clear whether the Apple Watch will be as much of a hit as the iPod and iPhone were. Though the watch isn't set to be released until April 24, 2015, Apple has already released an Apple Watch SDK, known as WatchKit.
We won't dive very far into the specifics of WatchKit today--rather, we will simply cover the basics of making an Apple Watch app. It's definitely not like making an iPhone app for a tiny screen. The Apple Watch is (currently) meant to coexist with the iPhone, and is in fact dependent on the iPhone.
Big big BIG note: you need the latest version of Xcode in order to run Apple Watch apps. If you didn't check Facebook over the break (you really should be doing that, you know...), you would've seen the announcement for Xcode 6.2's release. You must download Xcode 6.2 in order to run Apple Watch apps. Period.
Is It Carnival Yet?
So, the Apple Watch we will be building is called Is It Carnival
Yet?, and is based off of the website
isitcarnivalyet.com made by CMU's very own
Matt Schallert. You should download the base iPhone app
here.

Our goal is to write an Apple Watch app which piggybacks off of the base iPhone app and displays the information on the Watch's screen. It's pretty simple, and gives us a lot of room to mess around with WatchKit.
You should look through the code in the base iPhone app. Note that you're not really required to know any of the code in the CarnivalFinder.swift file--just the two functions and what they return: carnivalYet() returns either "YES" or "NO", depending on if it's Carnival (or nil if something goes wrong), and lastUpdated() returns the last time we accessed Matt's website (or nil if something goes wrong).
Complete App
You can download the complete app here.
Intro to WatchKit
These notes are based off of Ray Wenderlich's AWESOME tutorial on Watch Kit, with modifications. As such, you should read through the above tutorial to know exactly how to make basic apps. We'll cover the most important points of WatchKit here.
Converting an App to Support Apple Watch
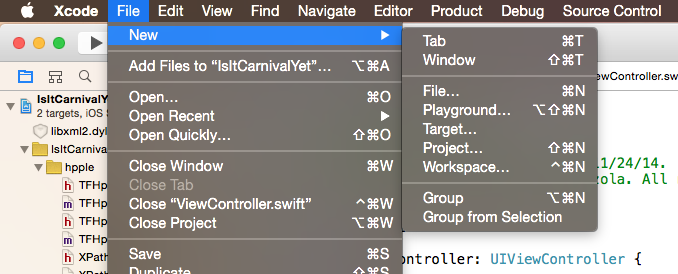
Suppose you have a favorite app, such as Is It Carnival Yet, and you want to extend it to Apple Watch. Simple go to File > New > Target:
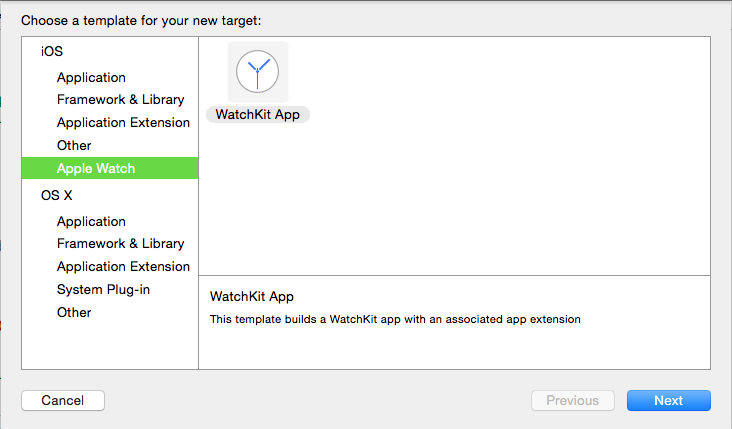
And then under iOS > Apple Watch, select WatchKit App:
You'll then get to choose some Target Options. You should uncheck the Include Notification Scene box since we will definitely not cover that today. This scene is called upon when a push notification is sent to your Apple Watch. You can Include Glance Scene if you want, but it's likely we won't cover that either today. This is, of course, so that your app appears in Glances
.All in all, your options should look like this:
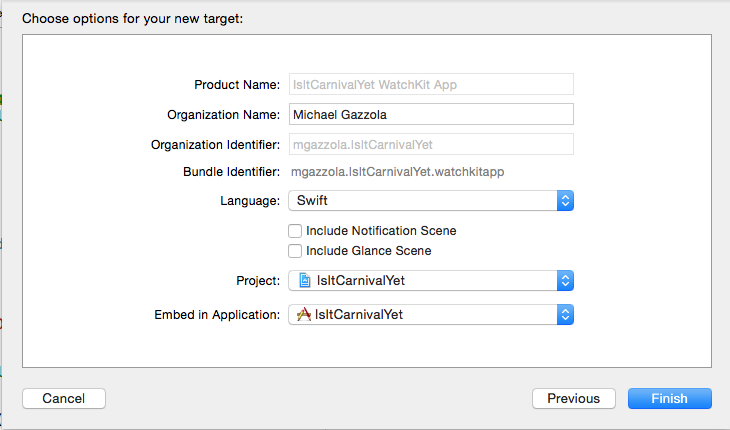
Hit Finish to finally add the Apple Watch extension.
How the Apple Watch Works
The Apple watch is not meant to run standalone apps yet. You must have an iPhone 6 or iPhone 6 Plus to run Apple Watch apps, at the time of this writing. As such, when you add an Apple Watch target to your app, it's broken into two separate groups:
The WatchKit App group is the UI stuff that runs on your Apple Watch. This is ALL Storyboards and no code.
The WatchKit Extension group is the code which glues your Apple Watch UI to your iPhone app. The code here runs when your app launches or a button is pressed on your Apple Watch.
For now, the best way to think of the Apple Watch is as an extra mini screen for your iPhone.
Terminology
The stuff that we would normally call views, controls, and view controllers have different names for the Apple Watch. Nobody really knows why--we just accept that this is Apple being Apple. These objects are respectively called interfaces, interface objects, and interface controllers.
The WatchKit App Group
Let's focus on the WatchKit App group for now. Remember, this is the Storyboards-with-absolutely-no-code which runs the UI on your Apple Watch. Under the IsItCarnivalYet WatchKit App folder is one Interface.storyboard--this is the main storyboard for your app.

Tiny, isn't it? It should look familiar though. You can drag-and-drop interface objects onto this Storyboard just like with regular Storyboards. There's no concept of Autolayout, but you don't exactly have freeform placement of interface objects onto your interface controller. It takes some getting used to. Spend some time trying to place labels and buttons onto the Storyboard to learn how it works. This will also allow you to become familiar with Apple Watch interface objects.
You'll notice that there is a light notion of Autolayout here, but it's not nearly like the Autolayout that we learned. Every UI element must be relative to either another UI element or to an edge of the screen. But, you don't really get to set constraints.
Note that under the Attributes Inspector you can set all sorts of attributes, just like with regular Storyboards. In addition, this Inspector can help you place items on the screen.
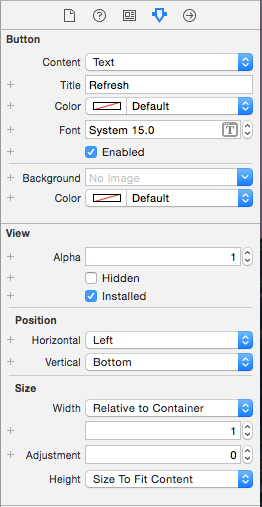
Your goal is to make a UI like this:

Connections
How do we connect these UI elements to actual code though? Can we even do the Control-Click-And-Drag that we're used to? It turns out that we totally can. We connect them to our WatchKit Extension group. Keep in mind that the WatchKit Extension group actually runs on the iPhone and not the Apple Watch. So, we are making connections over Bluetooth! Isn't that cool?!
Open up your Assistant Editor (the thing that brings up two screens) and navigate to the InterfaceController class under your WatchKit Extension group. It should do this automatically, but Xcode tends to be full of surprises. Control click and drag all of the UI elements like you're used to doing!

Now, it's time to talk about running this app in the simulator and then adding the extension code.
Running the Apple Watch App
So, hey, look up here:

Right now, Xcode is configured to build and run the IsItCarnivalYet iPhone app. We want to run the WatchKit app. So, click on IsItCarnivalYet and select IsItCarnivalYet WatchKit App.

Now hit run! You should see this screen:
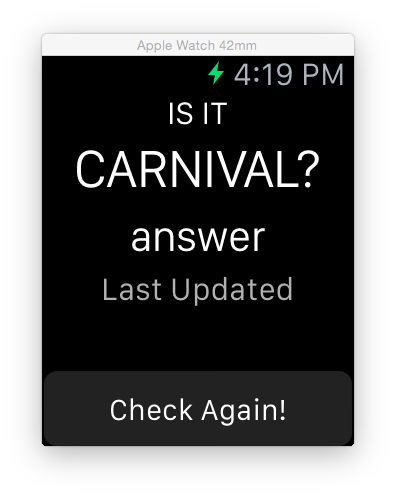
If nothing popped up, or you want to switch between the 38mm and the 42mm screen, open up your iOS Simulator and go to Hardware > External Displays. There, you can select which Apple Watch to use.
The WatchKit Extension Group
Making Your Own Framework
How do you share code between your iPhone and your Apple Watch? They don't just magically compile together, although that would be wicked awesome. Your iPhone app and your Apple Watch are inherently different projects which compile with different libraries.
The way that Apple suggests to handle this problem is to create your very own framework. You've seen frameworks like UIKit and CoreLocation. Now, you get to learn how to make your very own!
Since very few of your will actually make Apple Watch apps for final projects or anything of the like, we won't cover how to make your own Framework, since the details are very boring and complicated. If you're interested in making your own Apple Watch app, you should contact Mike, who will be able to teach you how to share code between your iPhone and your Apple Watch.
This section may be updated later to contain proper information on how to accomplish this process. For now, check out this link for more information!
Interface Lifecycle
You'll notice that your InterfaceController.swift came with three functions. The first one is awakeWithContext(_:), which is kinda like a viewDidLoad for your Apple Watch app. It's called when everything is set up but not displayed just yet. You should use this function to configure your interface objects, but not make any calls that could take a while to complete. The second function is willActivate(), which is sorta like viewWillAppear. You can take this time to make longer function calls to populate the data on your screen.
Finally is didDeactivate, which we won't really cover. It's called when your app has been removed from the Apple Watch screen.
Populating Data
We currently have our InterfaceController set up like this:
class InterfaceController: WKInterfaceController {

    @IBOutlet var answerLabel: WKInterfaceLabel!
    @IBOutlet var lastUpdatedLabel: WKInterfaceLabel!

    @IBAction func refreshButton() {
    }

    override func awakeWithContext(context: AnyObject?) {
        super.awakeWithContext(context)
        // Configure interface objects here.
    }

    override func willActivate() {
        // This method is called when watch view controller is about to be visible
        // to user
        super.willActivate()
        self.getCarnivalInfo()
    }

    override func didDeactivate() {
        // This method is called when watch view controller is no longer visible
        super.didDeactivate()
    }

}
Let's add a function which actually retrieves the Carnival info from the CarnivalFinder. Make sure you import CarnivalKit at the top of the file!
func getCarnivalInfo() {
    let carnivalYet = CarnivalFinder.carnivalYet() ?? ""
    if carnivalYet == "YES" {
        self.answerLabel.setTextColor(UIColor.greenColor())
    } else {
        self.answerLabel.setTextColor(UIColor.redColor())
    }
    self.answerLabel.setText(carnivalYet)

    let lastUpdated = CarnivalFinder.lastUpdated() ?? ""
    self.lastUpdatedLabel.setText(lastUpdated)
}
Now our refreshButton should simply be:
@IBAction func refreshButton() {
    self.getCarnivalInfo()
}
And our willActivate() should be:
override func willActivate() {
    // This method is called when watch view controller is about to be visible
    // to user
    super.willActivate()
    self.getCarnivalInfo()
}
Now run!

As you can tell, I finished this app at the last minute.