![]()
For
this particular problem, we will use a 4 elements for a coarse mesh, and 16
elements for a fine mesh.
MAIN MENU ->
Preprocessor
PREPROCESSOR -> Meshing ->
Size Contrls
SIZE
CONTRLS -> ManualSize ->
Lines ->
PickedLines

The window below prompts you for the lines you want to mesh. Then you would click on each of the 4 lines that makes the circumference of the rectangle. Pick these lines to specify the boundary used in meshing this member.

After you pick every line composes the circumference, you will see the following figure.

Now we have to
tell the program how many divisions we want to mesh this rectangle into. We
can also specify the size (length) of the each small segment after meshing.
For the simplicity of the problem, we will mesh this rectangle into 4 pieces,
that is each line will have 2 divisions.
Then, we enter 2 into the NDIV
box.
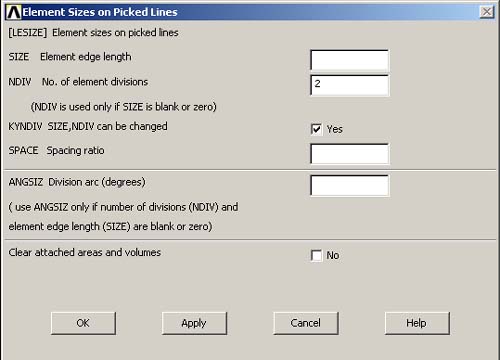
Then click OK.
Then, you will see that the circumference of the rectangle has been divided
into 2 portions per each line.

MAIN MENU -> Preprocessor
PREPROCESSOR -> -Meshing -MeshMESH -> Area -> MappedMAPPED -> 3 or 4 Sided

Then the window below should appear.
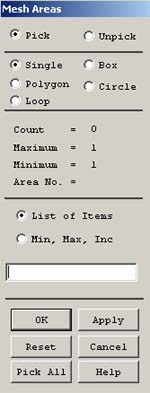
In the window, MESH AREAS, click on the plate. The area we selected will be active.
Click
OK.
Wait for the program to mesh the part - this may take several seconds. The
part will now appear broken down into a 4 element mesh, with 2 elements along
the length of the plate and another 2 elements along the height.

After
meshing lines, we have managed to mesh the whole rectangle. You can see from
the picture above that we have 4 subdivisions for this coarse mesh.
REMEMBER
TO SAVE YOUR FILE OFTEN.