Overview
In this assignment, we will implement a few different techniques manipulate images on the manifold of natural images. First, we will find a latent variable whose reconstruction result best matches the given real image. In the second part of the assignment, we will take a hand-drawn sketch and generate an image that fits the sketch accordingly.
Manipulating image in the latent space (Preview from Course Assignment webpage)

|
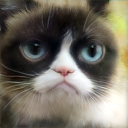
Part 1 Inverting the Generator
In this part, we will invert a generator through solving a non-convex optimization problem. Given a fixed Generator \( G \) and a target image, the goal is to find a latent vector, when fed as input to the generator, the generator can generate a image close to target. $$ z^* = \text{arg} min_{z} L(G(z), x) $$ Here, I implement the loss as a combination of L1 loss and content loss (by passing generated images through VGG19 and calculate loss on a specific layer). In general, adding content loss term does not noticeablly influence the final generated images. For most of the experiment, I chose weight for perceptual loss equal to 0.1, which makes its magnitude approximately equal to the L1 loss.

|

|

|

|

|

|
From above images, we can see that compared to Vanilla GAN, StyleGAN generally yields better results. In addition, optimizing w+ code yields better images compared to optimizing w code. This is an expected phenomenon, as w+ code's vector size is 10 times (depending on how much Ada-In layers are implemented) larger than the w code, which means we can "over-fit" the latent variable to get results closer to the target. In terms of the calculation efficiency, Vanilla GAN is the fastest to optimize and StyleGAN's optimization take much longer. The calculation time of different settings are listed below. For each optimization the iteration number is set to 1000. The code is running on a GTX 1080Ti.
| |Model| | |Latent Variable| | |Use Perceptual Loss| | |Time (sec)| |
|---|---|---|---|
| Vanilla GAN | z | No | 6.74 |
| Vanilla GAN | z | Yes | 11.41 |
| StyleGAN | w | No | 20.01 |
| StyleGAN | w | Yes | 29.22 |
| StyleGAN | w+ | No | 20.15 |
| StyleGAN | w+ | Yes | 28.39 |
Part 2 Interpolate your Cats
In the interpolation part, we will use two images as targets and optimize two latent variable \(z_1, z_2\) with respect to corresponding target. Then we use linear interpolation between two latent variable to get a set of latent variables. $$z’ = \theta z_1 + (1 - \theta) z_2$$

|

|

|

|

|
From above results, we can see that images from Vanilla GAN are much more blurry and images from StyleGAN are more perceptually satisfiable. Moreover, StyleGAN's interpolation results capture texture and color changes between two target images while Vanilla GAN fails to do so.
Here are some other results by interpolating w+ code.
More results

|

|

|
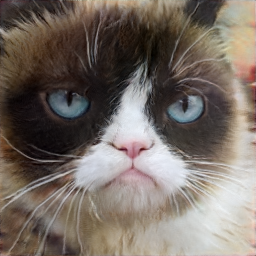
Part 3 Scribble to Image
Similarly, in this part we will still manipulate image in the latent space, but here the target is not a real image. Instead, we will use some sketch as the optimization goal. The motivation of using sketch as target is that this allows user to draw some simple lines and GAN will automatically fill in some realistic details. Here the optimization goal can be defined as: $$z^* = \text{arg} \min_z ||M * G(z) - M * S||^2,$$ where ∗ is the Hadamard product, M is the mask, and S is the sketch.
Gallery

|

|
Sparse sketch (which is poorly drawn) contains few details and inconsistent color. The generated image has little correlation to the sketch.

|

|
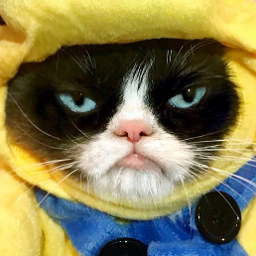
After adding more detail and use consistent color, the generated image match better with the sketch. The mouth position and eyes position are quite similar in the sketch and generated images.

|

|
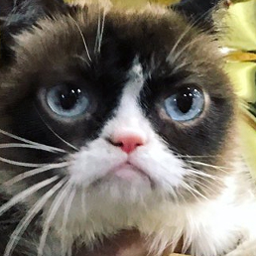
Using provided sketch from the Assignment (4.png). As this sketch contains more color detail and the color is more consistent with Grumpy Cat. We can observe stronger correlation between the generated image and the sketch.
Bells and Whistles
High Resolution GAN
I use the pretrained weights of high resolution model (128 x 128, 256 x 256) to generate images in this part. With higher resolution, the image quality is much higher and we can observe more interesting details.
Project

|
|
|
Interpolate
|
|
|
|