Eclipse is a free open-source Java environment available from http://eclipse.org. Eclipse is a Java
program, but it uses a custom user interface toolkit that does not run
on all platforms that supports Java 2. Check the web site for
supported platforms. Eclipse requires a Java 2 runtime, so you need to
install the Java 2 SDK first before installing Eclipse. You can
download the SDK from http://java.sun.com/j2se/.
For this course, you will want the
J2SE 1.4.2 release. (If you have a Macintosh, the Java 2 SDK is already
installed)
When you start Eclipse, a startup screen appears, and the program spends some time loading various modules.
Eclipse will ask you for your workspace (where on your computer the
projects you are working on will be stored.) The prompt will look like
the following: Click on the Browse...
button to navigate to the directory of your choice if it is not already
selected or in the drop-down menu...
When Eclipse has finished loading, you see a screen similar to the
following:

If you already have your program in project workspace (see above), but it is not in the Package Hierarchy window on the left of the screen, then you need to make a project that contains the file(s). Follow these steps.
Select File->New->Project
from the menu. You will get the following dialog.
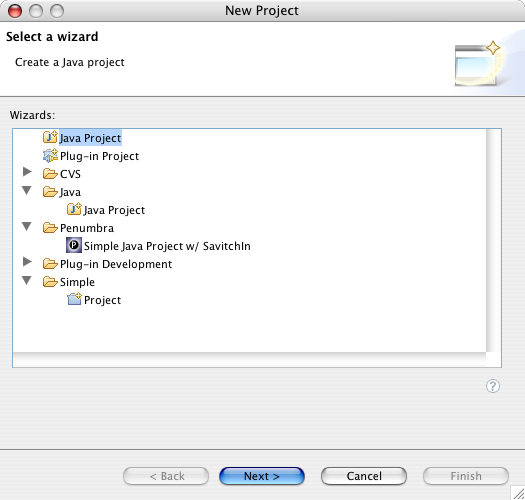
Select the Java Project option and click on the Next > button. (Do not select the Simple option!)
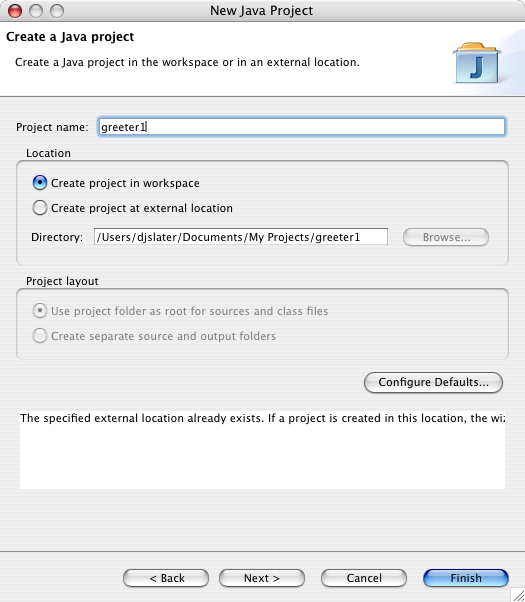
In the following dialog, give a name to the project, the same name as the directory that contains the files (watch spelling and capitalization). There should be a message indicating The specified external location already exists. Eclipse will then attempt to import all the resources available at that location. Check Create project in workspace if it has not been selected.
Click on the Finish button.
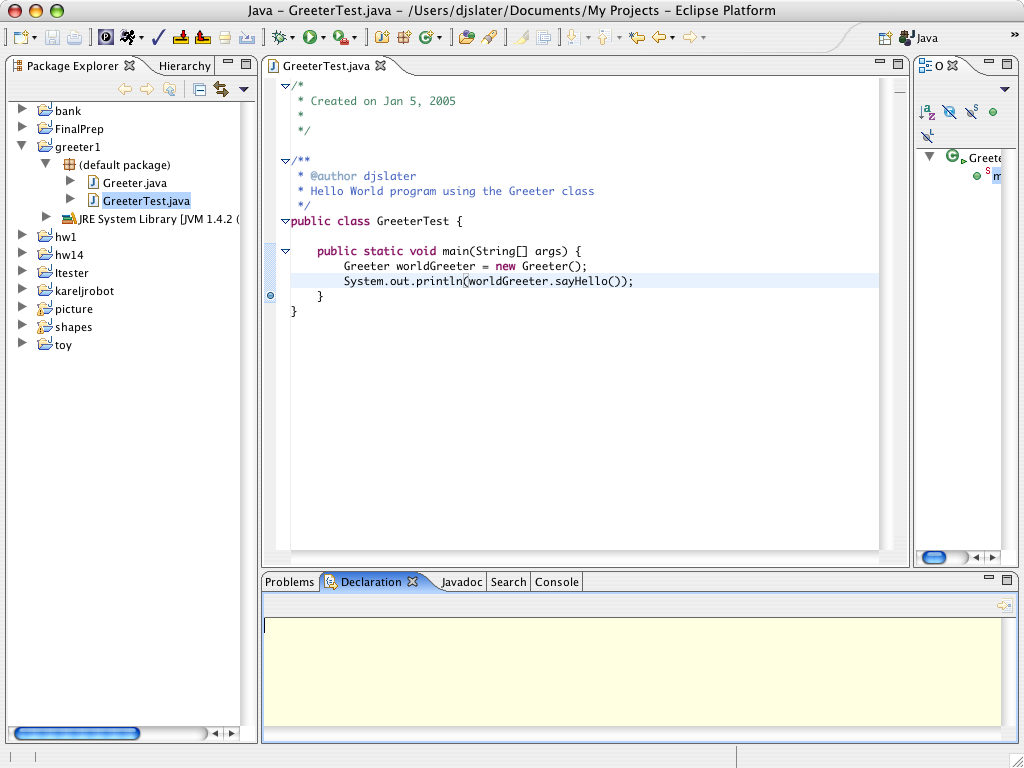
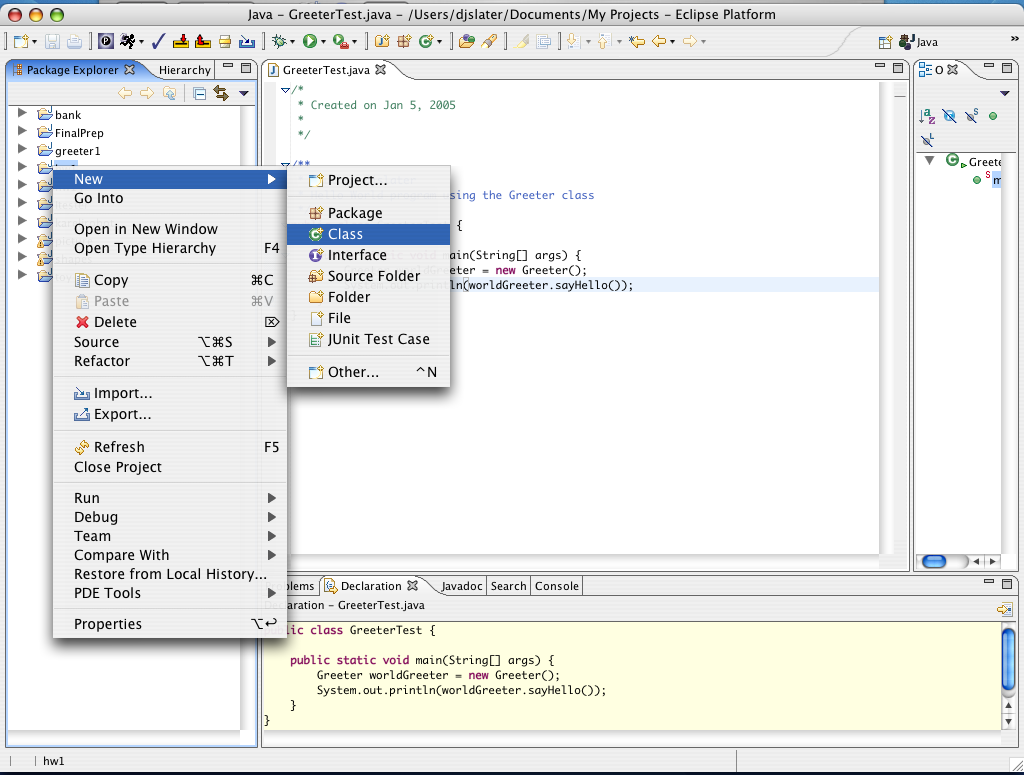
The project appears in the left hand panel. Expand it, and also expand the default package icon. Double-click on one of the file names. The file is displayed in an edit window:
If you write a program from scratch, then you can start your work in
Eclipse. It is always best to place each of your programs into a
separate directory. Eclipse will create the directory for you.
Select the Java option and click on the Next> button. (Do not select the Simple option!)
In the following dialog, give a name to the project. Accept the default choices, Create project in workspace and Use project folder as root for sources and class files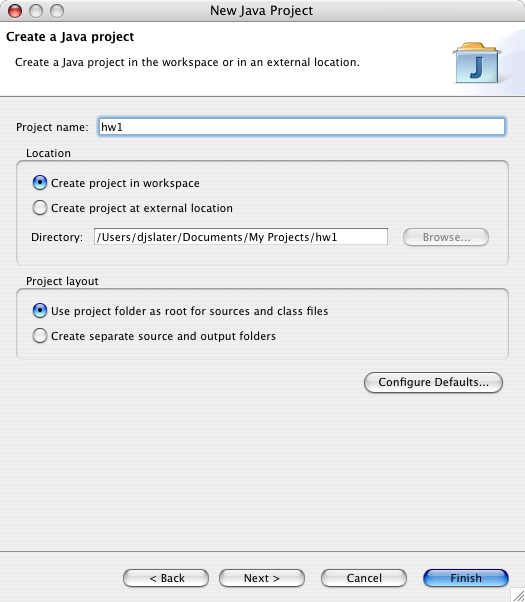
The New Class dialog
appears.
Supply the name of the class. If you want a main method for this class, check the box public static void main(String[] args).
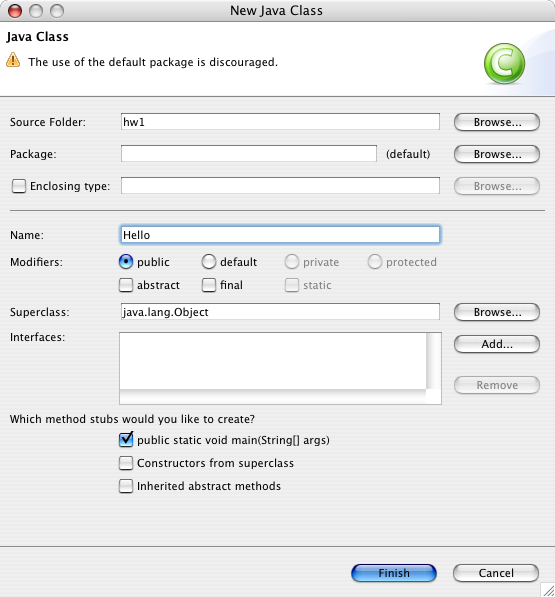
Click on the Finish button.
Finally, you get an editor window into which you can type your program.
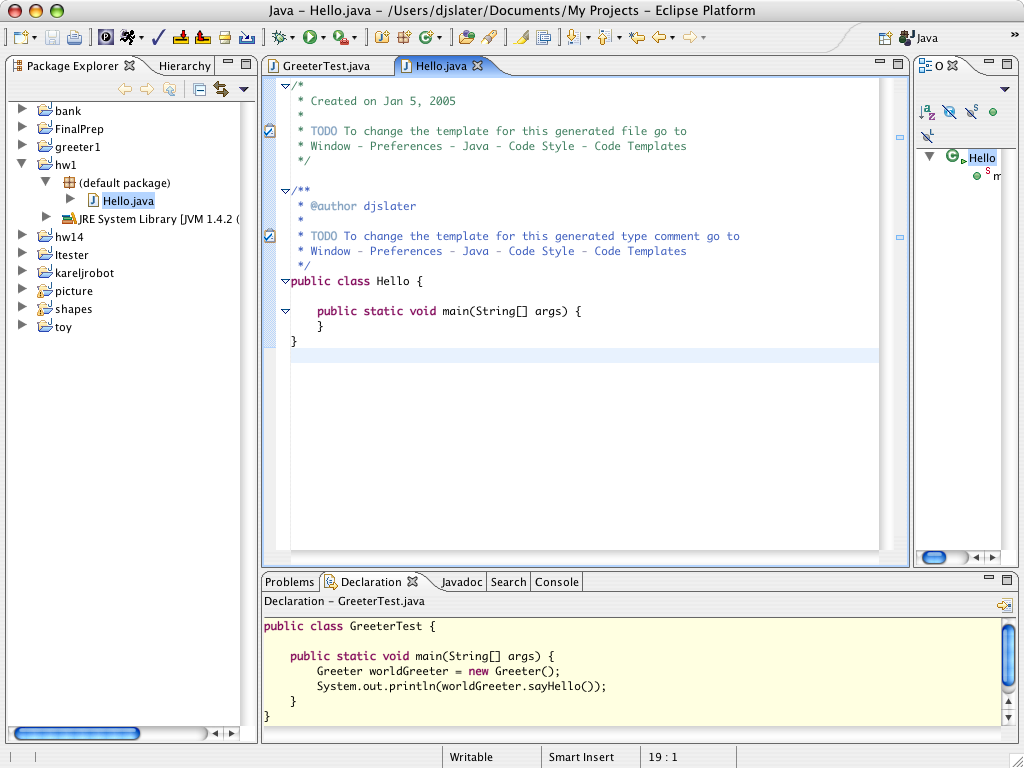
As you type in your program, occasionally select File->Save
from the menu to save your work.
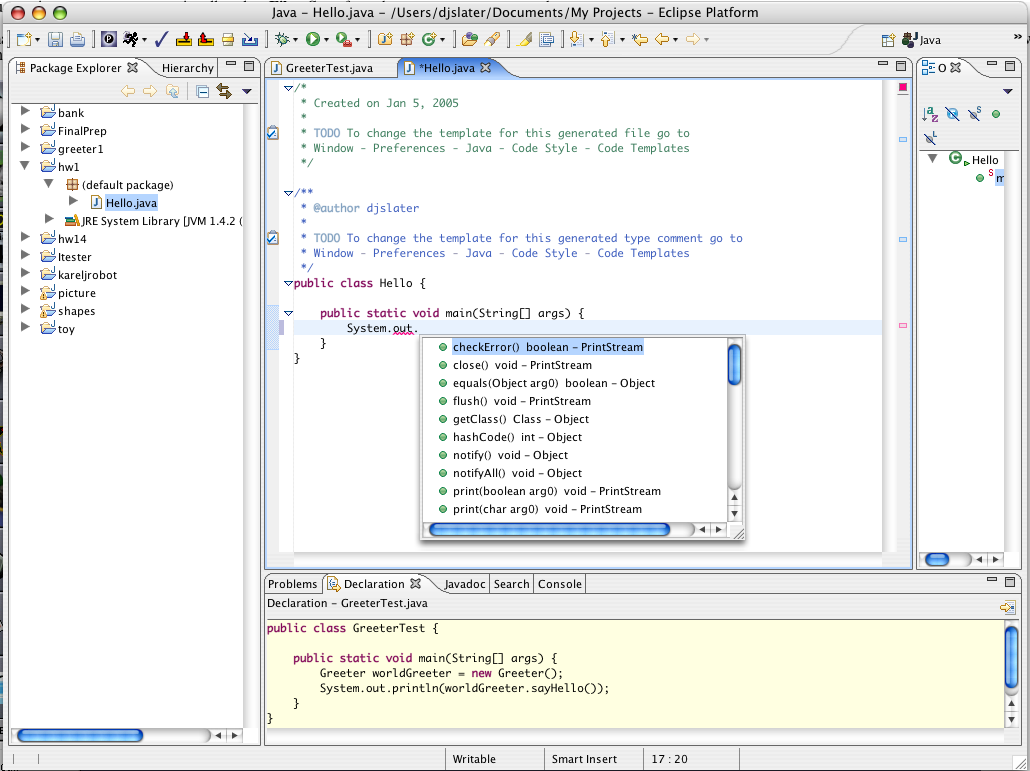
You may also want to experiment with some of the other convenience
features of Eclipse, such as Source->Generate
getter and setter.
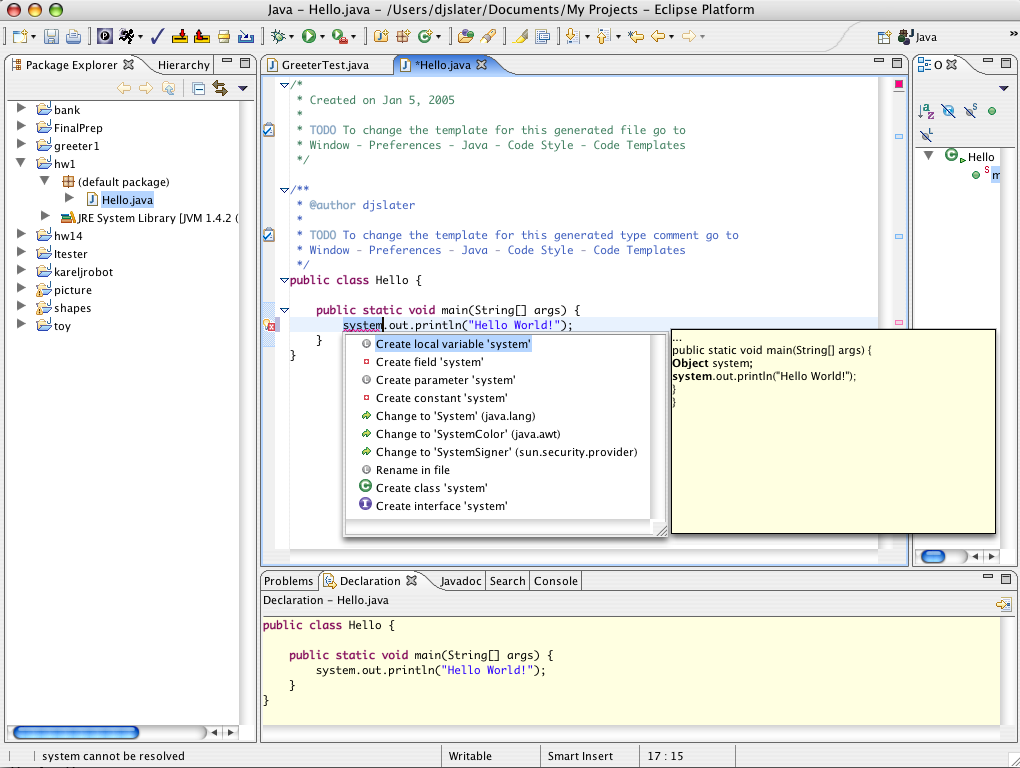
Eclipse continually compiles
(attempts to convert your source code into byte-code for the machine), so the
Editor will display
problems in your program. (See the
red X in the leftmost column in the editor window below.)
By double-clicking on the red X, a description of the problem and
some helpful options are displayed. In
this case, you would click on Change
to 'System' (java.lang)
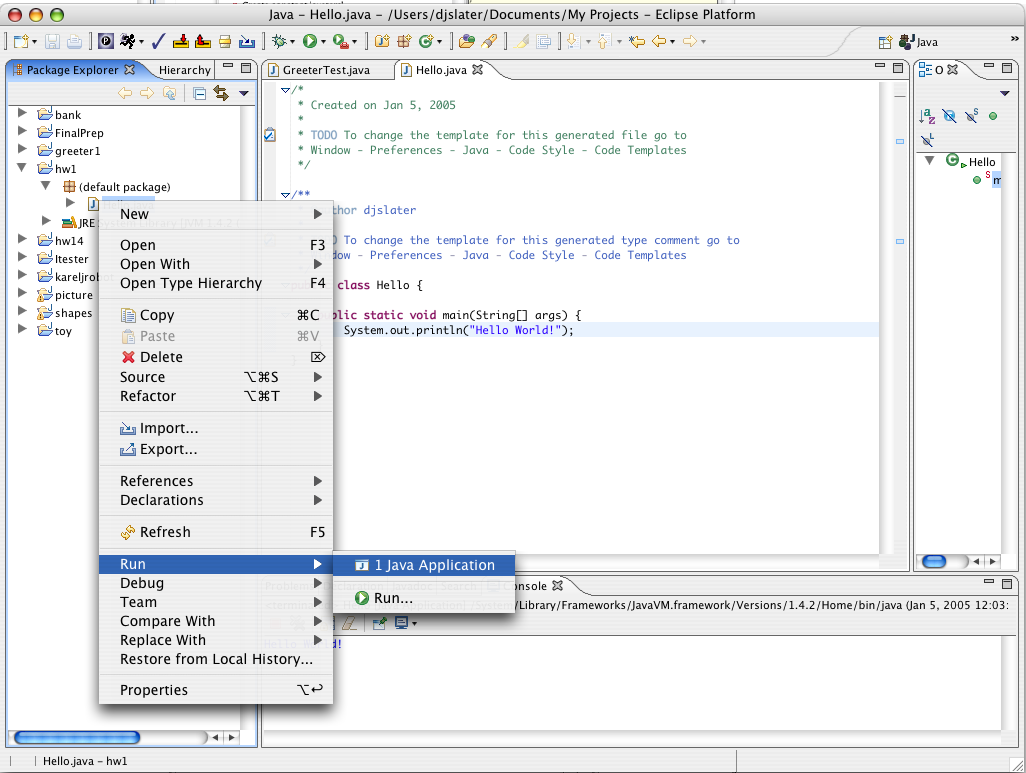
To run a program, right-click (Windows) or control-click (Macintosh) on the file with the main method, and from the context menu select the Run->Java Application menu option. The program runs. Any console output is directed to a window at the bottom of the screen.
To run an applet, make sure the current project is still selected in the leftmost pane. Then select the menu option Run->Java Applet. Eclipse will launch the applet viewer on the subclass of Applet that it finds in your project.
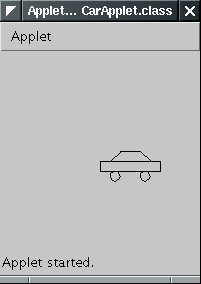
The applet viewer is started with a default size which is rather
small. Just resize the applet window.
Close the window to terminate the applet.
Select Project -> Generate
Javadoc from the menu. You will get a dialog such as the
following one:

Click the cleckbox for the project that you want to document. Then
make sure that the destination directory is correct. Click on Finish.
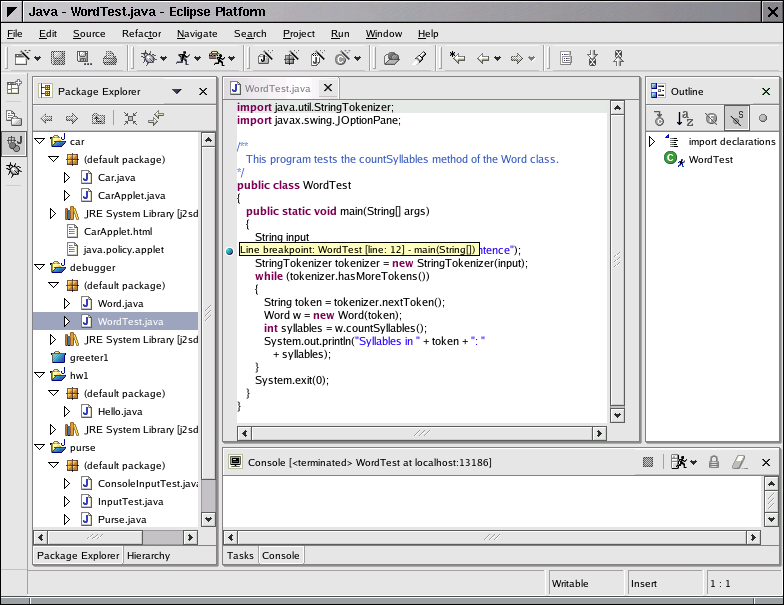
Before debugging a program, you should set a breakpoint at the start
of the main method.
Double-click on the gray bar to the left of the edit window, next to
the first source line after the
line public static void
main(String[] args). A blue dot appears, indicating the
breakpoint.
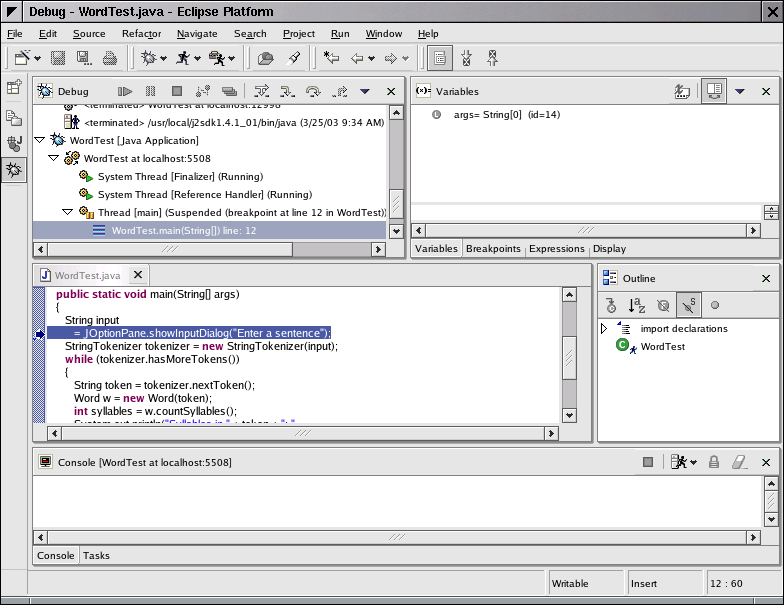
Then select the menu option Run->Debug as...->Java
Application. The debugger starts and switches the Eclipse display
to the debugger perspective.
It pauses at the breakpoint that you set.
Whenever you select the menu option Run->Step Over (or the F6 keyboard shortcut), then the debugger executes one line of the program, without stepping inside method calls. For example, tracing over the call
Word w = new Word(token);
will not trace inside the Word constructor but simply run the program to the next line of the main method.
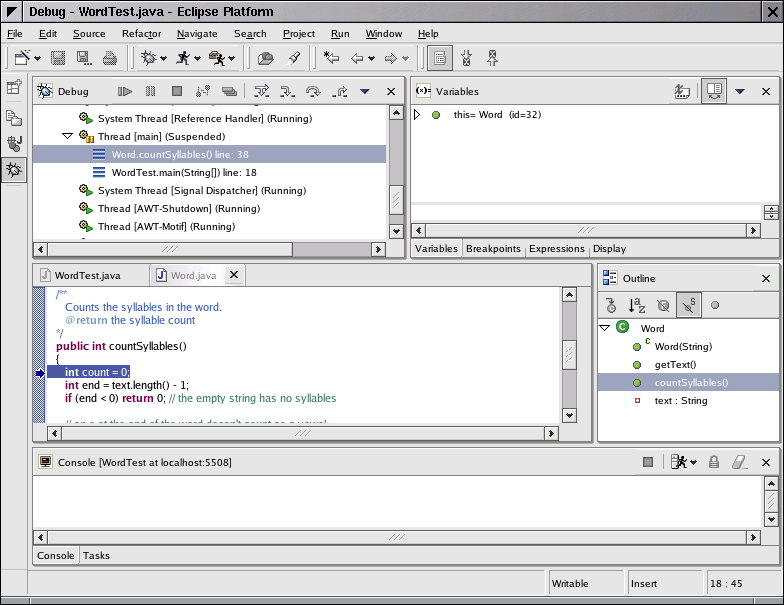
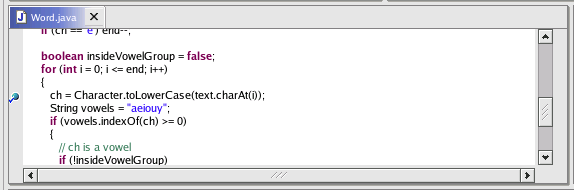
Contrast that with the menu option Run->Step Into(or the F5 keyboard shortcut). This command traces inside method calls. For example, tracing into the line
int syllables = w.countSyllables();
stops at the first line of the countSyllables method:
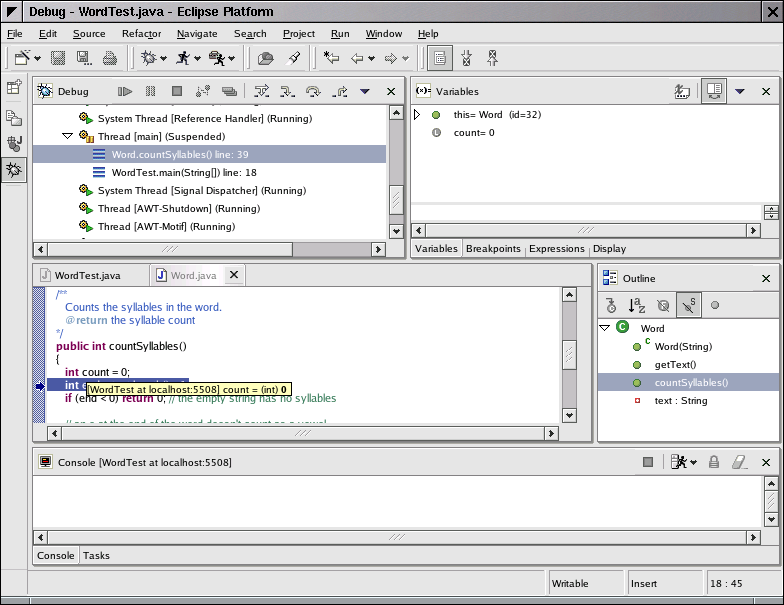
To see the value of a variable of a simple type (such as a number or
a string), simply hold the mouse pointer over the variable name when
the
debugger is stopped. Then the contents of the variable is displayed in
a
small rectangle next to the variable name. For example, here is the
contents of the count variable in the countSyllables method.
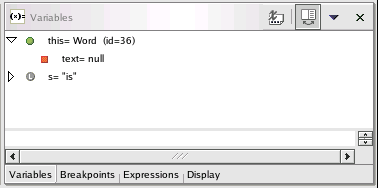
The top right window shows all local variables. Click on the
triangles to look inside objects. To see the instance fields of the
implicit parameter, look inside this.
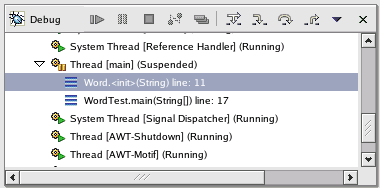
The top left window shows the call stack (with the most recently
called method on top). For example, the following call stack shows that
the WordTest.main method
called the Word.<init>
method, that is, the constructor.
Tracing through a program can be tedious. Often, you want the
program to run at full speed until a particular line of code is
encountered. To set a breakpoint at a line, double-click on the
gray bar to the left. A blue dot indicates the breakpoint.
Now select the menu option Run->Resume or hit the F8 keyboard shortcut. The program runs to the next breakpoint, stopping only for user input.
You can set as many breakpoints as you like.
To remove a breakpoint, double-click on it with the mouse.
When the program has completed, the debugger stops automatically.
When you want to terminate a debugging session without running the
program to the end, select the menu option Run->Terminate.
To return to the Java perspective (in which you can edit and compile
your program), locate the perspectives toolbar at the left of the
Eclipse frame: