Lecture 5 - Animation
Animations make an application exciting. They point out interactions that are non-obvious, they make an application look clean and well designed, and they can even be necessary in some contexts. We are lucky as iOS developers as many animations come baked in: navigation pushing and popping, table view cells being inserted and deleted, modal views appearing from a few directions we can choose, etc. If you want to implement your own custom animation or transition, you will need to use the classes found in the CoreAnimation library. We have already discussed the CoreAnimation layer briefly, but in this lecture we will dive into it deeper and explore how we can manipulate the different layer properties over time to create rich animations.
Animation Application
We have written a simple application that shows off some of the basic animation techniques discussed below, which can be downloaded after the lecture here.
The skeleton for this app (all of the detail controllers, but without the animation code itself) is here.
The CoreAnimation Layer
As we discussed before, every UIView has an associated CoreAnimation Layer or CALayer. Much of the UIView properties are directly inherited from this layer. Background color, position, opacity, corner radius, and size are all inherited from this layer. The view itself is really just an abstraction that UIKit provides us to make view manipulation easier. If we want to perform more complicated actions, we must access the layer directly.
You should take a look at the CALayer class reference to get an idea of how huge and important this class really is. You can do a LOT with layers, most of which we will not be able to cover in a 2 hour lecture.
Using CALayer to customize a view's appearance
We will not dive into this very deeply, as it is not extremely complicated. If you want to update a view's border color, corner radius, or opacity, you need to access the layer property directly like this:
override func viewDidLoad() {
    self.view.layer.cornerRadius = 5.0
    self.view.layer.borderColor = UIColor.redColor().CGColor  // CGColor is necessary!
    self.view.layer.borderWidth = 10.0
    self.view.layer.opacity = 0.7
}
Easy, right? Cool, let's move on to more interesting things.
Animating a UIView
When iOS 5 came out, the updated SDK allowed developers to directly animate a view without having to access the underlying CALayer. This is awesome. Like, really awesome. And the API is dead simple to use because it uses something that is pretty much integral to the Swift language: anonymous functions. Say we want to animate a change to a view's background color, we could run an animation like this:
override func viewDidLoad() {
    self.view.backgroundColor = UIColor.redColor()
}

override func viewDidAppear(animated: Bool) {
    UIView.animateWithDuration(1.0, animations: { () -> Void in
        view.backgroundColor = UIColor.greenColor()
    })
}
The result looks like this:
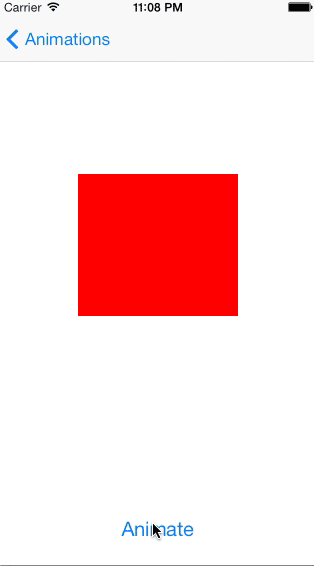
Super simple. You can update pretty much any property on views and have it animate over the given duration. You can also specify a timing curve style. By default, this style is linear, meaning that the rate of change of the object is constant (after x% of the time, x% of the animation has completed). You can ease-in to an animation (starts off slow then gets faster), or you can ease-out of an animation (starts fast, ends slow), or ease-in-ease-out! One example of this is:
UIView.animateWithDuration(1.0, delay: 0.0, options: UIViewAnimationOptions.CurveEaseIn, animations: { () -> Void in
    self.view.center = CGPoint(self.view.center.x + 50, self.view.center.y)
}, completion: nil)
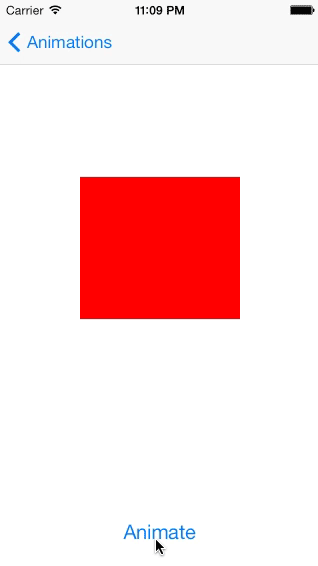
So, how will this animation behave?
Of course, you can apply multiple changes to view properties and have them composed together into one animation. For example, you could change the frame of a view, it's background color, and it's position all in the same animation. During the animation, each one will be changed over the provided duration concurrently.
Chaining Animations
See that completion function on the end? That's the perfect spot to chain multiple animations together. It's an anonymous function that is called whenever the initial animation ends. It's passed in a boolean signifying that the initial animation has completed (it could've been interrupted), but we will likely never use that.
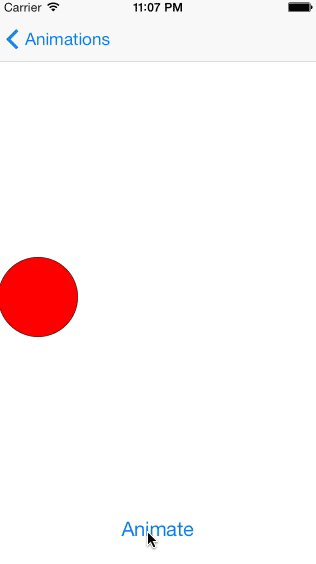
So, for example, maybe we really like "bubble" animations, which we can achieve by chaining multiple frame changes together. For example, below you will find a simple bubble animation achieved with 3 different frame changes. Suppose we have a red square in the middle of our screen, called view. We can animate that view as such:
let initialFrame = view.frame
let secondFrame = CGRectInset(initialFrame, -30, -50)
let thirdFrame = CGRectInset(secondFrame, 10, 15)
let fourthFrame = CGRectInset(thirdFrame, -15, -20)
let animation = CAKeyframeAnimation(keyPath: "frame")
UIView.animateWithDuration(0.1, animations: { () -> Void in
    view.frame = secondFrame
}, completion: { (finished) -> Void in
    UIView.animateWithDuration(0.1, animations: { () -> Void in
        view.frame = thirdFrame
    }, completion: { (finished) -> Void in
        UIView.animateWithDuration(0.1, animations: { () -> Void in
            view.frame = fourthFrame
        })
    })
})
You can find a full version of this animation in the Animations application we linked at the top of this page. The result looks like this:
Definitely spend some time to mess around with the UIView-provided animation functions. There's a lot of functionality you have here.
CABasicAnimation
You'll notice one very huge flaw with chaining animations: you can only chain a few before the tabbing goes insanee and you have 19 nested anonymous functions. Now there's nothing linguistically wrong with this, since Swift doesn't really care. But it's poor style. Complicated animations can take as many as dozens of steps. We need a new way to handle animations.
Well, while UIView provides functionality for animation, it's just a pretty abstraction over real animation functionality. Apple's animation API, called CoreAnimation, does all of the animation work behind-the-scenes. So, we'll tap into CoreAnimation to figure out how to do real, easy, powerful animations (that don't require tabs 10 levels deep).
So, the first CoreAnimation class we'll work with is CABasicAnimation. Simply enough, it's the easiest animation to work with. To work with CABasicAnimation, you instantiate an animation object tuned to the property you want to modify, set a "to"-value, set a "from"-value, set any other animation properties (timing curve, etc), add the animation to the object, and you're good to go.
For example, recall the first animation, where we turned the square from red to green. To do that with CABasicAnimation, it's simply:
// Specify "backgroundColor" since that's the layer property we want to modify.
let animation: CABasicAnimation = CABasicAnimation(keyPath: "backgroundColor")
animation.duration = 1.0
animation.fromValue = UIColor.redColor().CGColor as AnyObject
animation.toValue = UIColor.purpleColor().CGColor as AnyObject
view.layer.addAnimation(animation, forKey: "backgroundColorFade")
view.backgroundColor = UIColor.greenColor()  // The animation resets the color.
Notice that we have to use the CoreGraphics colors. This is because CoreAnimation animations work on the layer level, and so we can't use the UIView abstractions. Also notice that we must manually set the background color after the animation has completed. If we don't do this, the background color will not actually change, and will revert to the original value after the animation has completed (i.e., it'll animate from red to green, and then blink back to red).
Also notice that we had to give a "key path" field in the first line. There's a list of the different values you can give to this field here, thanks to Apple documentation.
We also have to downcast the colors from CGColor to AnyObject. This is because the animation values take in values of type AnyObject. Some types (such as CGPoint) are not downcastable to AnyObject, and so you'll have to bridge it to NSValue. The lecture code goes over how to this. Swift 1.0 in action, folks.
Finally, in the line view.layer.addAnimation(animation, forKey: "backgroundColorFade"), we specify a key called "backgroundColorFade". No two animations on an object can have the same non-nil key. So, this is a provided convenience to the developer to keep tabs on animations, since we can define the keys. In practice, you can just set this value to be niil, but if you have tons of conflicting animations (you probably won't), it's a great thing to have.
CAAnimationGroup
If you have several CABasicAnimations, possibly with similar properties (durations, timing curves, etc), you don't need to set all of their properties individually. You can group them all into a CAAnimationGroup, which smushes a bunch of animations together and treats them as one singular animation. An example of this with rotations:
func rotationAnimation() -> CABasicAnimation {
    let animation = CABasicAnimation()
    animation.fromValue = 0  // rotation of the object, in radians.
    animation.toValue = 4 * M_PI
    return animation
}

override func animate(view: UIView) {
    let zAnimation = self.rotationAnimation()
    zAnimation.keyPath = "transform.rotation.z"

    let xAnimation = self.rotationAnimation()
    xAnimation.keyPath = "transform.rotation.x"

    let yAnimation = self.rotationAnimation()
    yAnimation.keyPath = "transform.rotation.y"

    let group = CAAnimationGroup()
    group.duration = 2.0
    group.repeatCount = Float.infinity
    group.animations = [zAnimation, xAnimation, yAnimation]
    group.timingFunction = CAMediaTimingFunction(name: kCAMediaTimingFunctionLinear)
    view.layer.addAnimation(group, forKey: "3D-rotation")
}
CAKeyframeAnimation
Okay, great. So, we can do simple animations. But we want to do a bit more. How do we do long, complicated animations? How do we chain animations?
Notice that with CABasicAnimation, we set a to-value and a from-value. CoreAnimation then interpolates between those two points and creates an animation. What if we added more points to the mix though? What if, instead of specifying that our to-value is the color red and our from-value is the color green, we could specify that we want to hit all the colors of the rainbow?
Enter CAKeyframeAnimation. Rather than taking in two points, it takes in an array of interpolation points. This can be colors, CGPoints, CGFramess--anything you can put into the to- and from-values. So, if you wanted to do, say, a quick, endlessly repeating rainbow effect, you can say:
let animation = CAKeyframeAnimation(keyPath: "backgroundColor")
let arrayColors: [AnyObject] = [UIColor.orangeColor().CGColor,
                                UIColor.yellowColor().CGColor,
                                UIColor.greenColor().CGColor,
                                UIColor.blueColor().CGColor,
                                UIColor.purpleColor().CGColor,
                                UIColor.redColor().CGColor]
animation.values = arrayColors
animation.duration = 0.5
animation.repeatCount = Float.infinity
view.layer.addAnimation(animation, forKey: "MulticolorAnimation")
This is fairly identical to the above example, so it's pretty straightforward.
Could we implement the blow-up effect using CAKeyframeAnimation? Not really. Remember, CoreAnimation works with the layer of a view. The layer is not concerned with the size of the object. It does pretty much anything else, but the one thing it does not do is size changes. So you're stuck using the ugly chaining for that effect.
Here's another example of keyframe animation, but with moving the object around:
let initialPoint = view.center
let secondPoint = CGPoint(x: initialPoint.x + 50, y: initialPoint.y)
let thirdPoint = CGPoint(x: secondPoint.x, y: secondPoint.y + 50)
let fourthPoint = CGPoint(x: thirdPoint.x - 50, y: thirdPoint.y)
let points = [NSValue(CGPoint: initialPoint),
              NSValue(CGPoint: secondPoint),
              NSValue(CGPoint: thirdPoint),
              NSValue(CGPoint: fourthPoint),
              NSValue(CGPoint: initialPoint)]
let animation = CAKeyframeAnimation(keyPath: "position")
animation.values = points
animation.duration = 0.5
animation.repeatCount = Float.infinity
view.layer.addAnimation(animation, forKey: "Multipoint")
Complex Paths
If you want to have a complicated path that a view travels on during your animation (such as a curve), you will need to specify that path with a UIBezierPath or a CGPath. These do not work with the abstract UIView animate function discussed earlier, so we must use a CAKeyframeAnimation. A keyframe animation is just an animation that takes in a list of values and interpolates through these values from left to right to achieve an overall animation. If we wanted an object to take a curve path, we could actually give the keyframe animation a long list of CGPoint values which would give us the desired effect of a complex path.
There are classes the represent arcs and other complex paths that you can use to generate a CGPath, which is basically a long list of CGPoints. Today, we're gonna focus on a type of path known as a bezier curve.
Bezier Curves
UIBezierCurve supports both quadratic and cubic curves, which are great if you're interested in that stuff (most of you: don't worry about it). They sound scary, but are actually really intuitive when you just look at a picture, so let's do that!
A quadratic bezier curve is defined as some scary mathematical function, but what you need to know is that there are three points that define the curve. There are two endpoints and a control point. The control point defines the direction the curve travels as it makes it's way on the path from point A to point B. Check out the picture below and notice how the curve does not pass through the control point, but instead uses it as a directional tool. I like to think of each control point as having an associated gravity, and the curve just reacts to the gravitational pull of each point.

A cubic bezier curve just has one more control point to help define a path. Each control point is associated with one of the endpoints as you can see in the image below.
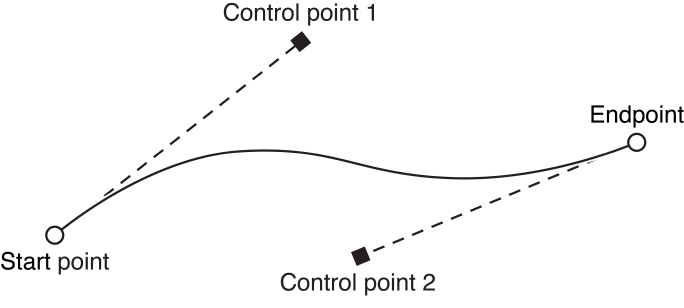
As you can see, the straight line path between an endpoint and it's control point is tangent to the curve. This is how the curve itself is determined when it is being drawn.
Animating Along Bezier Curves
So, now, if we want an animation path to follow a Bezier curve, we must construct a Bezier curve first. Then, we apply its built-in CGPath (a long list of CGPoints) as a keyframe animation.
let path = UIBezierPath()
path.moveToPoint(view.center)

let initialPoint = view.center
var controlPoint1 = CGPoint(x: initialPoint.x + 30.0,
                            y: initialPoint.y - 100.0)
var controlPoint2 = CGPoint(x: controlPoint1.x + 30.0,
                            y: controlPoint1.y - 100.0)
var destination = CGPoint(x: initialPoint.x + 90,
                          y: initialPoint.y)

path.addCurveToPoint(destination, controlPoint1: controlPoint1, controlPoint2: controlPoint2)

controlPoint1.x += 90.0
controlPoint2.x += 90.0
destination.x += 90.0

path.addCurveToPoint(destination, controlPoint1: controlPoint1, controlPoint2: controlPoint2)

let animation = CAKeyframeAnimation(keyPath: "position")
animation.path = path.CGPath
animation.duration = 1.5
view.layer.addAnimation(animation, forKey: "bezier")

view.center = destination
Here's what the bounce (roughly) looks like:
This looks a bit complicated, but it's really just making a bezier path, and telling the view to follow that path throughout the course of the animation. Adding a different timing function changes the behavior of the view, and causes it traverse the path with a different velocity based on the easing function. Try playing around with the different easing function to see what affect they have